Roblox Studio for Beginners: Creating Your First Game
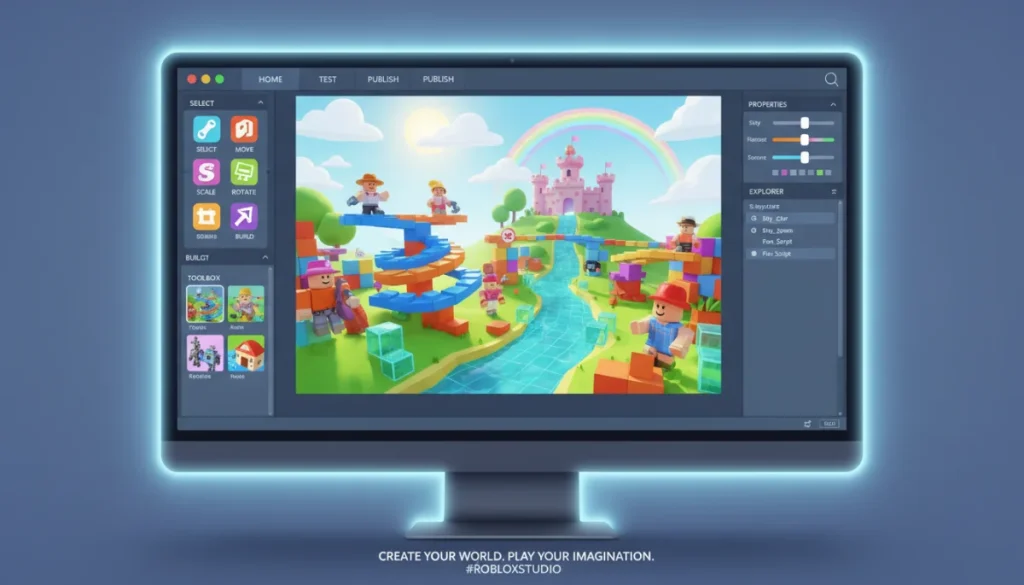
Roblox Studio empowers aspiring developers to create immersive games, offering a user-friendly platform with robust tools for building, scripting, and publishing your unique virtual worlds for millions to experience.
Embarking on the journey of game creation might seem daunting, but with Roblox Studio for Beginners: Creating Your First Game, you’re about to discover a world where your imagination is the only limit. This guide is designed to demystify the process, transforming complex concepts into accessible steps for anyone eager to build their own virtual experiences.
Understanding Roblox Studio: Your Creative Canvas
Roblox Studio is more than just a game engine; it’s a powerful and accessible platform that allows millions of users worldwide to design, develop, and publish their own games within the Roblox ecosystem. For beginners, it offers a remarkably intuitive interface, making the initial steps into game development less intimidating. It’s a place where you can bring your wildest game ideas to life, from intricate obstacle courses to sprawling adventure maps, and share them with a global audience.
The platform provides a comprehensive suite of tools, from visual builders that allow you to drag and drop elements to a robust scripting environment powered by Lua. This combination means you can start creating without needing extensive coding knowledge, gradually introducing more advanced concepts as you become more comfortable. The beauty of Roblox Studio lies in its scalability, supporting both simple builds and complex, multi-layered game experiences.
The Core Components of Roblox Studio
When you first open Roblox Studio, you’ll be greeted by several key windows and toolbars. Understanding these components is fundamental to navigating the environment effectively. Each part plays a crucial role in your game development workflow, allowing you to manage assets, manipulate objects, and test your creations.
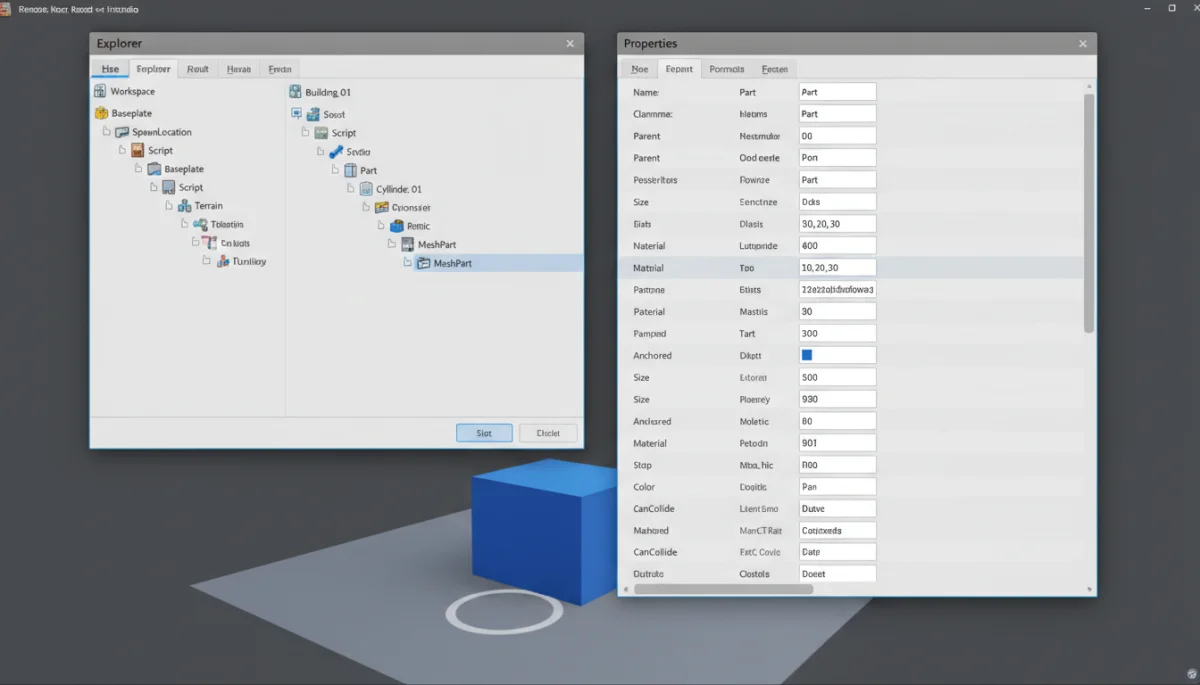
- Explorer Window: This window provides a hierarchical view of all objects in your game, from parts and models to scripts and services. It’s essential for organizing your game’s structure.
- Properties Window: Here, you can modify the attributes of selected objects, such as their size, color, position, and transparency. It’s your primary tool for customising every element.
- Toolbox: A vast library of free assets, including models, decals, audio, and plugins, shared by the Roblox community. It’s an invaluable resource for quickly populating your game.
- Output Window: Displays messages from scripts, errors, and debugging information, helping you troubleshoot issues in your game.
Mastering these foundational elements will significantly accelerate your learning curve. Think of them as your primary toolkit, each serving a distinct purpose in the construction of your virtual world. As you spend more time in the Studio, their functions will become second nature, allowing you to focus more on creative design rather than technical navigation.
In essence, Roblox Studio provides a structured yet flexible environment for game creation. Its design caters to both absolute beginners and seasoned developers, ensuring that everyone can find their footing and contribute to the ever-expanding universe of Roblox games. The journey begins with understanding these basics, setting the stage for more complex and engaging projects.
Setting Up Your First Project: The Blank Canvas
Before you can create your first game, you need to set up a new project in Roblox Studio. This involves selecting a template and getting familiar with the initial workspace. Starting with a blank baseplate is often recommended for beginners, as it provides a clean slate without predefined elements, allowing you to build from the ground up and understand each component you add.
Upon launching Roblox Studio, you’ll see a ‘New’ tab where you can choose from various templates. While some templates offer pre-built environments like ‘Obby’ or ‘Village,’ selecting ‘Baseplate’ gives you maximum control and helps you learn the core building mechanics without distractions. This approach fosters a deeper understanding of how every object and script contributes to your game world.
Navigating the Workspace and Camera Controls
Once you’ve opened a new baseplate project, you’ll be in the 3D workspace. Efficient navigation is crucial for building. You’ll need to master the camera controls to move around your environment, zoom in on details, and get different perspectives of your creations. These controls are fairly standard for 3D applications, making them intuitive for many new users.
- Right-click and drag: Rotates the camera around its current focus point.
- W, A, S, D keys: Moves the camera forward, left, backward, and right, respectively.
- Q and E keys: Moves the camera down and up.
- Scroll wheel: Zooms the camera in and out.
Practicing these controls will make your building process much smoother. Imagine trying to place a tiny detail on a large structure without precise camera control – it would be incredibly frustrating! Dedicate a few minutes to simply flying around your empty baseplate, getting a feel for the movement and perspective changes.
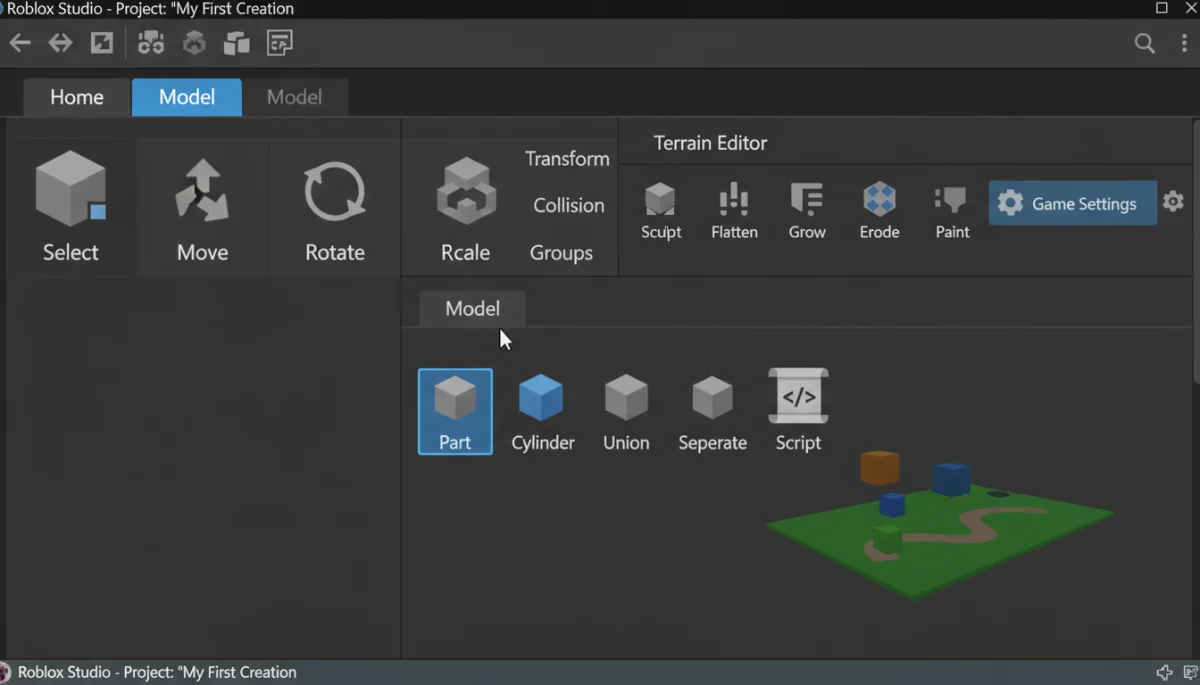
Beyond camera movement, understanding the various modes for manipulating objects is equally important. The ‘Home’ tab in the toolbar provides essential tools like ‘Select,’ ‘Move,’ ‘Scale,’ and ‘Rotate.’ Each of these tools allows you to interact with parts in your game in specific ways, from repositioning them to resizing and reorienting them to fit your design.
In conclusion, setting up your project and familiarising yourself with the workspace are foundational steps. A blank canvas might seem intimidating, but it’s the perfect starting point for truly understanding the mechanics of Roblox Studio. With solid navigation skills, you’re ready to begin adding your first objects to the world.
Building Your First Objects: Parts and Models
The core of game creation in Roblox Studio revolves around building with ‘parts.’ Parts are the fundamental building blocks – simple geometric shapes like blocks, spheres, wedges, and cylinders – that you can combine and manipulate to create anything you envision. Think of them as digital Lego bricks, offering endless possibilities for construction and design.
To add a part, navigate to the ‘Home’ tab and click on the ‘Part’ button. This will insert a basic block into your workspace. Once inserted, you can use the ‘Move,’ ‘Scale,’ and ‘Rotate’ tools to position, resize, and orient your part. Experiment with different shapes and sizes to understand how they interact and how you can combine them to form more complex structures.
Combining Parts into Models
As you add more parts, your workspace can quickly become cluttered. This is where ‘models’ come in. A model is a collection of parts grouped together, treated as a single object. Grouping parts into models helps keep your game organized, makes it easier to move and duplicate complex structures, and improves game performance.
To create a model, select all the parts you want to group (by holding Shift and clicking on each part, or by dragging a selection box around them) and then right-click, selecting ‘Group’ (or use the shortcut Ctrl+G). You’ll see the selected parts transform into a single ‘Model’ in your Explorer window. You can then rename this model to something descriptive, like ‘House’ or ‘Tree,’ making your game structure much clearer.
Consider the process of building a simple house. You’d start with a flat part for the floor, then add four walls (more parts), and finally a roof. Each of these components would be a separate part. Once completed, selecting all these parts and grouping them into a ‘House’ model makes it easy to move the entire house, duplicate it, or even save it to your Toolbox for future use in other projects. This modular approach is key to efficient and scalable game design.
Another important aspect of building is understanding materials and colors. In the ‘Home’ tab, you’ll find options to change the material (e.g., plastic, wood, metal, glass) and color of your parts. These aesthetic choices significantly impact the visual appeal of your game and can help convey specific atmospheres or functions for different objects.
In summary, building with parts and organizing them into models forms the backbone of visual game development in Roblox Studio. It’s a hands-on process that encourages experimentation and creativity, allowing you to transform basic shapes into intricate and engaging game environments.
Introducing Scripting: Bringing Your Game to Life with Lua
While building with parts creates the visual world, scripting with Lua is what brings your game to life, adding interactivity, logic, and dynamic behaviour. Lua is a lightweight, powerful, and relatively easy-to-learn scripting language, making it ideal for beginners in Roblox Studio. It allows you to define how objects behave, how players interact with the environment, and how game events unfold.
To start scripting, you’ll typically insert a ‘Script’ object into a part or a service in the Explorer window. For instance, to make a part change color when a player touches it, you’d insert a script directly into that part. The script editor in Roblox Studio provides syntax highlighting and auto-completion, which are incredibly helpful for new scripters.
Your First Script: A Simple Part Interaction
Let’s consider a classic beginner script: making a part disappear when a player touches it. This simple example introduces several fundamental scripting concepts:
- Variables: Storing references to objects (e.g., the part itself).
- Events: Detecting when something happens (e.g., a touch).
- Functions: Blocks of code that perform specific actions.
- Properties: Changing an object’s attributes (e.g., its transparency or collision).
A basic script for this might look something like this (though the exact code would depend on the desired effect):
local part = script.Parent

local function onTouch(otherPart)
    local player = game.Players:GetPlayerFromCharacter(otherPart.Parent)
    if player then
        part.Transparency = 1
        part.CanCollide = false
        -- You could add a delay and make it reappear later
    end
end

part.Touched:Connect(onTouch)
This script introduces the idea of connecting a function to an event. When the ‘Touched’ event fires on ‘part’, the ‘onTouch’ function is executed. Inside ‘onTouch’, we check if a player touched the part and then modify its ‘Transparency’ and ‘CanCollide’ properties to make it invisible and non-collidable. This is a powerful concept that underpins most interactive elements in Roblox games.
Don’t be intimidated by the code. Start with small, manageable scripts and gradually build up your knowledge. There are countless tutorials and resources available online, including the official Roblox Developer Hub, which provides extensive documentation and examples. Experimentation is key; try modifying existing scripts or writing your own simple ones to see what happens.
In essence, scripting is where your game truly comes alive. It allows you to define rules, create challenges, and offer unique experiences to players. By learning Lua, you gain the power to turn static environments into dynamic, engaging worlds.
Testing and Debugging Your Game: Iteration is Key
Once you’ve started building and scripting, the next crucial step is consistently testing your game. Testing isn’t just about playing; it’s about identifying bugs, checking for unexpected behaviour, and ensuring that your game mechanics work as intended. This iterative process of building, testing, and refining is fundamental to creating a polished and enjoyable experience.
Roblox Studio offers built-in tools for testing your game directly within the environment. In the ‘Home’ tab, you’ll find ‘Play,’ ‘Play Here,’ and ‘Run’ buttons. ‘Play’ spawns your character at the default spawn point, allowing you to experience the game as a player would. ‘Play Here’ spawns your character at your camera’s current location, which is useful for testing specific areas without having to navigate across the entire map. ‘Run’ simply starts the game logic without spawning a player, ideal for testing server-side scripts or physics.
Common Debugging Techniques
Even the simplest games can have bugs. Debugging is the process of finding and fixing these errors. While it can sometimes feel like solving a puzzle, understanding common debugging techniques will save you a lot of time and frustration.
- Print Statements: The most basic yet powerful debugging tool. Use
print("Your message here")in your scripts to output messages to the Output window, helping you track the flow of your code and the values of variables at different points. - Output Window: Always keep an eye on the Output window. It will display error messages from your scripts, along with the line number where the error occurred, giving you a direct clue about where to start looking for problems.
- Breakpoints: For more complex scripts, you can set breakpoints in the script editor. When your code hits a breakpoint during testing, it will pause, allowing you to inspect variable values and step through your code line by line, understanding its execution path.
Effective debugging often involves a systematic approach. If a feature isn’t working, try to isolate the problem. Is it a building issue, a scripting error, or a combination? Can you reproduce the bug consistently? Answering these questions will guide you towards a solution. Don’t be afraid to break things and then fix them; it’s part of the learning process.
Another aspect of testing is gathering feedback. If you have friends or other developers, ask them to test your game and provide their honest opinions. Fresh eyes can often spot issues or areas for improvement that you might have overlooked. Iteration based on feedback is a cornerstone of professional game development.
In conclusion, testing and debugging are not optional steps; they are integral to game creation. By regularly testing your game and employing effective debugging techniques, you ensure a smoother development process and ultimately deliver a higher quality experience to your players.
Adding Polish and Details: Enhancing Player Experience
Once the core mechanics of your game are in place and functioning correctly, it’s time to focus on adding polish and details. This stage is crucial for transforming a functional game into an engaging and visually appealing experience. Small details can make a significant difference in how players perceive and interact with your creation, encouraging them to spend more time in your world.
Consider elements like environmental design. Instead of just a flat baseplate, add terrain using the ‘Terrain Editor’ in the ‘Model’ tab. You can sculpt mountains, dig rivers, and paint different textures like grass, sand, or rock. This immediately makes your world feel more alive and immersive. Experiment with different terrain tools to create varied landscapes that suit your game’s theme.
Implementing Visual and Audio Enhancements
- Lighting and Skyboxes: Adjusting the lighting settings (found in ‘Workspace’ > ‘Lighting’ in the Explorer) can dramatically change the mood of your game. You can control ambient light, brightness, and even add effects like bloom or sun rays. Custom skyboxes from the Toolbox can replace the default sky, further defining your game’s atmosphere.
- Sound Effects and Music: Background music and sound effects add another layer of immersion. You can upload your own audio files or find free ones in the Toolbox. Place ‘Sound’ objects in parts or use them in scripts to trigger specific sounds for actions like jumping, collecting items, or receiving damage.
- User Interface (UI): A well-designed UI is essential for communicating information to players. Use ‘ScreenGui’ objects to create custom health bars, score displays, or interactive menus. Clear and intuitive UI improves usability and guides players through your game.
Think about the small touches that make a game memorable. Is there a satisfying ‘ding’ sound when a player collects an item? Does the environment change subtly as the game progresses? These thoughtful additions contribute significantly to the overall player experience and reflect a higher level of craftsmanship.
Another aspect of polish is ensuring smooth gameplay. This includes optimizing your game for performance, reducing lag, and ensuring that all interactions feel responsive. While this can be a more advanced topic, even simple steps like grouping parts into models and avoiding excessively complex scripts can help. The goal is to create an experience that feels fluid and enjoyable, rather than clunky or frustrating.
In conclusion, adding polish and details is where your game truly shines. By focusing on visual aesthetics, immersive audio, and a user-friendly interface, you can transform a basic concept into a captivating experience that players will want to return to again and again.
Publishing Your Game: Sharing Your Creation with the World
After countless hours of building, scripting, testing, and polishing, the moment arrives to share your creation with the vast Roblox community. Publishing your game is a straightforward process in Roblox Studio, but it involves a few important considerations to ensure your game reaches its intended audience and is presented in the best possible light.
To publish, go to ‘File’ > ‘Publish to Roblox’ or ‘Publish to Roblox As…’. If it’s your first time publishing, you’ll need to give your game a name, a brief description, and choose settings like genre and access permissions (public or private). If you’re updating an existing game, simply select ‘Publish to Roblox’ to overwrite the previous version.
Optimising Your Game for Discovery
Just publishing your game isn’t enough; you need to make it discoverable. Roblox has millions of games, so standing out requires a bit of strategic thinking. The game’s title, description, and thumbnail are your primary tools for attracting players.
- Compelling Title: Your game title should be catchy, descriptive, and clearly convey what your game is about. Avoid generic names; aim for something unique and memorable.
- Detailed Description: Use the description to elaborate on your game’s features, mechanics, and what makes it fun. Highlight unique selling points and include relevant keywords that players might search for.
- Eye-Catching Thumbnail and Icons: These are the first visual impressions players get. Design a high-quality, engaging thumbnail and game icon that accurately represent your game and stand out from the crowd.
- Genre and Tags: Accurately categorize your game using the available genres and add relevant tags. This helps Roblox’s algorithm recommend your game to interested players.
Consider the player experience from the moment they see your game on the Roblox platform. Does the thumbnail instantly grab their attention? Does the description make them want to click and learn more? These external elements are just as important as the internal game design in attracting players.
After publishing, it’s also important to monitor your game’s performance. Roblox provides analytics that can show you player counts, retention rates, and other valuable data. Use this feedback to identify areas for improvement, whether it’s adding new content, fixing bugs, or adjusting game balance. Continuous updates and engagement with your player base can significantly extend your game’s lifespan and popularity.
In conclusion, publishing your game is the culmination of your development journey. It’s an exciting moment, but also an opportunity to apply marketing principles to ensure your creation reaches and resonates with the widest possible audience. With careful consideration of discoverability and ongoing engagement, your first game can truly become a success.
| Key Aspect | Brief Description |
|---|---|
| Roblox Studio Basics | Learn to navigate the interface, understand key windows like Explorer and Properties, and utilise the Toolbox for assets. |
| Building with Parts | Master creating and manipulating geometric parts, then grouping them into organised models for complex structures. |
| Introduction to Scripting | Use Lua to add interactivity and logic to your game, bringing static objects to life with events and functions. |
| Publishing & Discovery | Learn how to publish your game and optimise its title, description, and visuals for maximum player discovery. |
Frequently asked questions about Roblox Studio for beginners
Roblox Studio is designed to be highly accessible for beginners. While it has powerful features, its visual building tools and a simplified scripting language (Lua) make it relatively easy to start. Many tutorials and a supportive community are available to help new creators overcome initial challenges and learn at your own pace.
The best way to learn scripting is by starting with small, practical projects. Focus on understanding basic concepts like variables, events, and functions. Utilise the official Roblox Developer Hub, watch video tutorials, and experiment by modifying existing scripts. Consistent practice and breaking down complex problems into smaller steps are key.
Yes, you can potentially earn money from your Roblox games through the Developer Exchange (DevEx) programme. This involves creating engaging experiences that encourage players to spend Robux (Roblox’s virtual currency) on in-game purchases. Successful games with high player engagement and monetization can lead to significant earnings.
For beginners, focus on mastering the ‘Home’ tab tools: ‘Select,’ ‘Move,’ ‘Scale,’ and ‘Rotate’ for manipulating parts. Understand the ‘Explorer’ for organisation and the ‘Properties’ window for customisation. The ‘Toolbox’ is also crucial for quickly accessing assets and speeding up your building process.
You should test your game frequently and consistently throughout the development process. Test after every significant change or addition, no matter how small. This iterative testing helps catch bugs early, ensures new features work as intended, and provides continuous feedback on the overall player experience.
Conclusion
Embarking on the journey of game creation with Roblox Studio is a rewarding experience, offering a unique blend of creativity and technical skill development. This guide has walked you through the fundamental steps of understanding the environment, building your first objects, introducing basic scripting, and the crucial processes of testing, polishing, and ultimately publishing your game. Remember that every master builder started with a single brick. Your first game, no matter how simple, is a testament to your burgeoning skills and imagination. The Roblox platform provides an unparalleled opportunity to share your unique vision with a global audience, fostering a vibrant ecosystem where creativity knows no bounds. Keep experimenting, keep learning, and most importantly, keep building – your next great game is just a few clicks away.
